Climbing Kilimanjaro – The ultimate kit list
Who doesn’t love a kit list? You’ll get a list from your trek provider no doubt, but here is a list of everything I packed for climbing Kilimanjaro.
This list is the ultimate gear list. It includes everything I packed, with notes of things I think I didn’t need to bring with me AND things I wish I had packed. There are some items you might think are common sense, but I’ve kept them in the list because you never know, it might be something you’ve forgotten about! And I’ve even included what I took for the plane.
You. Are. Welcome.

Climbing Kilimanjaro: Packing + Sleeping
Large kit bag – A 90-120l duffel bag, with no wheels (suitcases are not suitable). Note your airport weight may be around the 23kg mark, but on the trail, your bag should not exceed 15kg weight. This is for the health and safety of the porters.
I used: Highlander Lomond Duffel 90l. It is no longer sold, but this Highlander duffel looks pretty great.
Day pack – Around 35l capacity should suffice, though this is up to personal preference. Used daily for carrying extra layers, waterproofs, snacks etc. Make sure you have a waterproof cover that fits it too.
I used: Osprey Sirrus 36 – a womens-specific backpack with the all-important hip snack pockets!
Sleeping bag – 4-seasons, with a comfort rating of -15. Nights can be cold on Kili!
I used: A second-hand Snugpack sleeping bag bought on eBay many years ago. This bag, plus a liner (see below), has done me well for many expeditions.
Sleeping bag liner – This will enhance the warmth of your sleeping bag as well as protect your sleeping bag from dirty feet. Many people use silk as it’s lighter in weight. I personally prefer a fleece liner for an expedition where it can get pretty cold! It’s heavier and bulkier than silk, but worth the weight in my opinion.
I used: Andes micro-fleece mummy liner
Pillowcase – Optional, but highly recommended! I took a basic, light pillowcase from home and filled it with clothes to use as a pillow each night. GENIUS.
Dry bags – Ensure all your clothes and sleeping items are dry in case of a sudden downpour. Also handy to organise your kit bag. I used them to separate snacks, dirty clothes, sleeping clothes, and electronics. Note: plastic bags are banned in Tanzania, so proper dry bags are a must.
I used: This set from amazon. Pleasantly surprised at how great they are for the price!
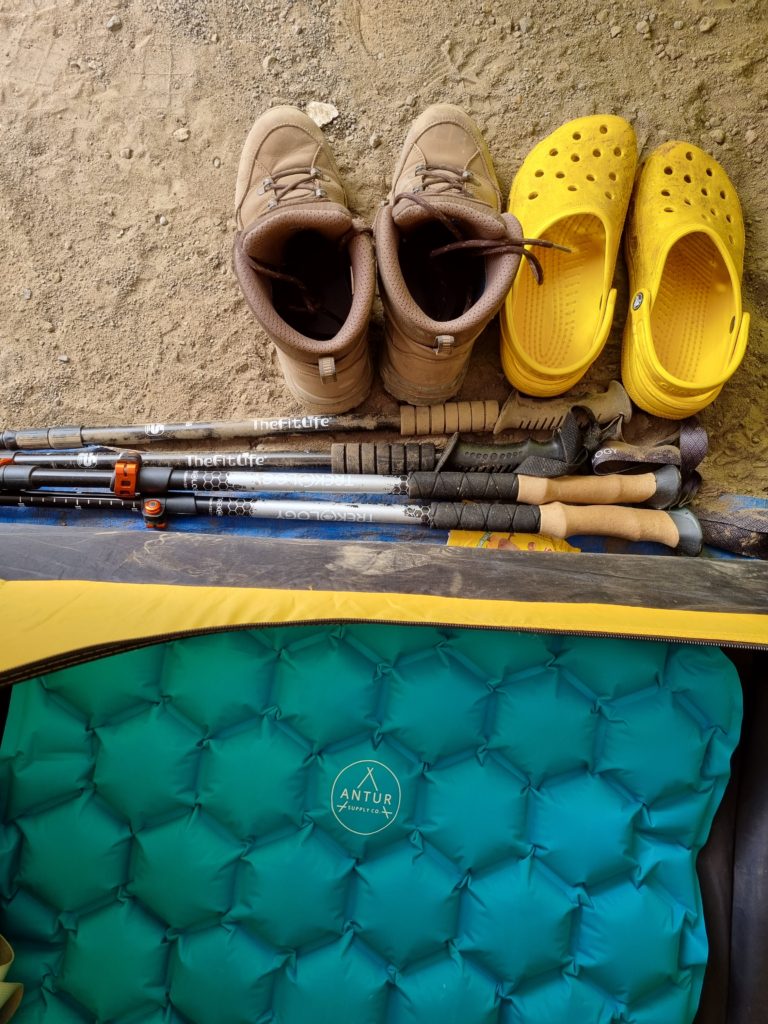
Sleeping mat – Check with your expedition provider, as this may be optional. We were provided with basic mats, but bringing my own added an extra layer of warmth and comfort.
I used: Antur Supply Co sleeping mat. An absolute gem of a mat, for an affordable price – and it’s a newer, small business. Wins all round!
Climbing Kilimanjaro: Clothing + Accessories
Layers are key! I know you’ve heard it a million times, but it’s true. Find a layering system that works for you though. Everyone does it slightly differently, in a way that works for them. The main emphasis is you have options to take off or put on as needed.
Long sleeve tops x 2 – Quick drying, base-layer style tops.
I used: Berghaus + Helly Hansen
T-shirts x2 – I could have gotten away with only 1x t-shirt, as it wasn’t as warm as you would think. But the weather changes, and I was glad to have a nice clean t-shirt for the last couple of days. Again, quick-wicking sports fabric is key.
Fleeces x2 – Two fleeces of different weights/warmth will suffice. I took one lightweight fleece and one heavier for summit night.
Gilet x 1 – The item I never thought I would love so much. I bought mine second-hand for running in winter, with no intention of using it on a trip, and my god I’m happy I took it. It was a perfect insulator when the wind was chilly but a down jacket was too much. And on summit night, it fitted under my down jacket as an additional layer of warmth.
I used: Mountain Warehouse gilet, second-hand from Vinted
Waterproof jacket – Breathable, waterproof and windproof, ideally Gore-tex. Make sure you can fit plenty of layers, including your down jacket, underneath it.
I used: Berghaus waterproof jacket
Waterproof trousers – Similar to above. Breathable and has plenty of room for going on top of layers. Zips around the bottom of the legs are great for getting over boots too.
I used: A cheap pair I’ve had for years and can’t remember where I got them!
Down jacket – Rated to -10. Ask in-store for help, as the puffiest jackets aren’t always the most insulative.
I used: Mountain Warehouse down jacket. Apparently is rated to -30, which after summit night, I highly question. However, it was comfortable, kept me warm with my other layers and in the evenings, had plenty of room for layers including additional space for a helmet under the hood and a really handy snack pocket (okay, map pocket, but I used it for snacksnacks).
Light hiking trousers/leggings x1 – The most worn pair of bottoms for your trip. Personal preference will dictate here, whether you choose traditional trousers, zip-off trousers that convert to shorts, or stretchier legging-style trousers.
I used: Montane Ineo Pro trousers. These are decent trousers with the flexibility of leggings.
Shorts x 1 – Optional and something I did not bring. Many others on the trip found good use in shorts when the weather was hot, particularly on the descent. In general, even when the sun was out, the air was too chilly for shorts. But again, personal choice.
Softshell trousers x 1 – For summit night and colder days. Fleece-lined, soft-shell trousers. I also wore mine in the evenings to ward off the chill and have something clean to wear.
I used: Some AMAZING softshell trousers from Decathlon – very similar to these. These were bought years ago but are my favourite long-standing hiking piece that’s lasted the test of time AND weren’t expensive! Definitely check out Decathlon.
Buffs x 3 – 2x lightweight and 1x fleece. The lighter buffs were invaluable for protection from dust coming off the trails plus added sun protection. The fleece-lined buff added a layer of warmth on summit night.
I used: 2x Hygge buffs + 1x fleece buff similar to this one from Yugen Explore
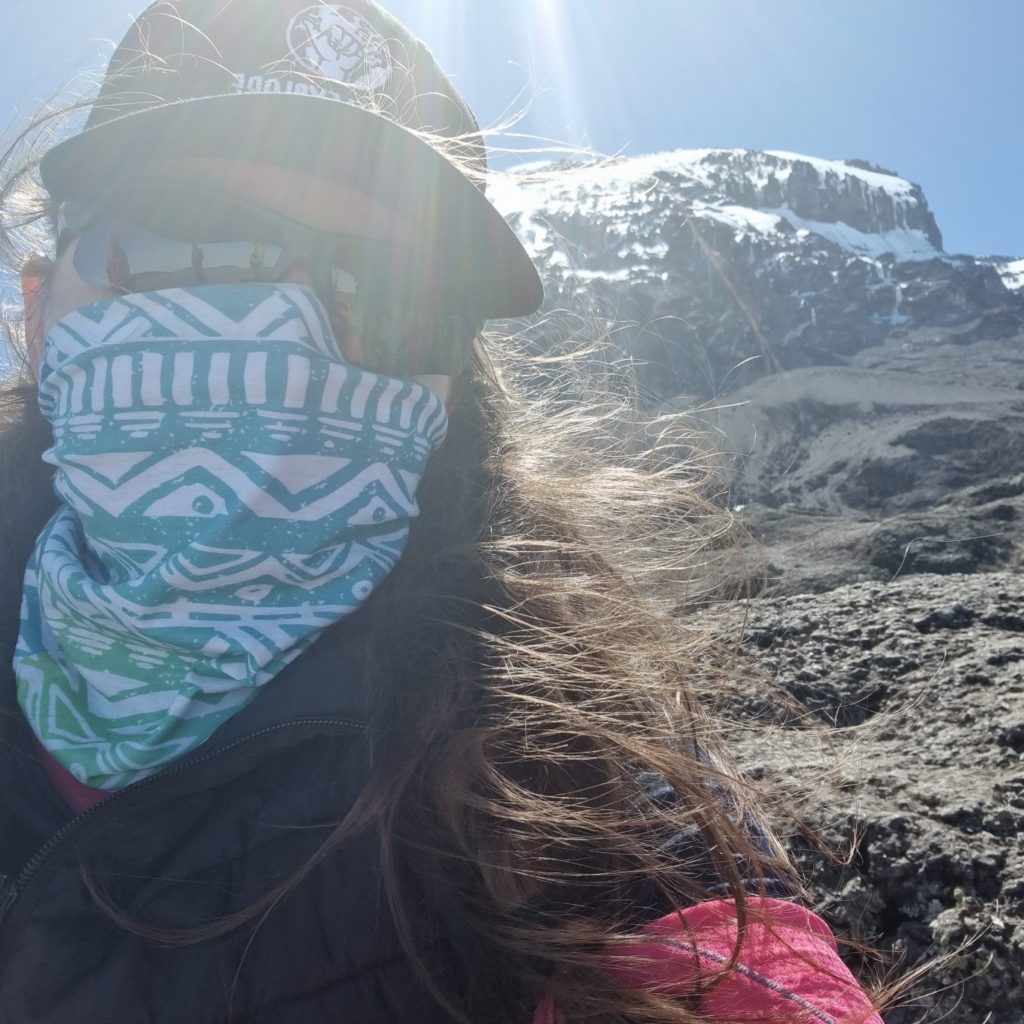
Beanie x 1 – This was my most used item by far! Warmth during the day and night, and saves everyone else’s eyes from seeing my unkept hair 🙂
I used: SLAB beanie
Cap or sunhat x 1 – Sun protection. Some people wore wide-brimmed hats. I personally prefer a cap.
I used: Yugen Explore cap
Sunglasses – Ensure these have category 4 UVA protection.
I used: BLOC Titan sunglasses – gifted, but amazing sunglasses. Category 4, super comfortable and they come with a removable foam insert which protects your eyes from strong winds.

Light pair of gloves – Worn for the majority of the trip, make sure they are a comfortable size.
Heavy gloves or mitts – For summit night. Make sure they are waterproof. I highly recommend mitts – the warmth they bring is unparalleled.
I used: OEX mitts from GoOutdoors. They are amazing.
Liner gloves – For use under your heavier gloves/mitts and maybe even your lighter gloves. Added warmth and a bit of protection if you need to remove your gloves for any reason. Get some with touchscreen capability so you can keep snapping photos!
Bed socks – A bit of a luxury item, but the feeling of putting on my favourite clean, soft, cosy socks at bedtime is ten-fold when you’re unshowered, sweaty and dirty on a mountainside!
Underwear x 9-11 – I never thought I’d be so opinionated about pants, but here we are. Make sure your underwear is breathable and designed for sports. If you’ve never had heat rash or chafe in that region, just take my word for it. This count of pants is only for the mountain. It’s all personal preference, but I suggest a fresh pair for each day plus a spare. I’m in the middle of writing a full post on this topic alone!
I used: These Decathlon pants are amazing and super affordable.
Sports bra x 2 – Worn on rotation. Breathable and wicking, but ultimately comfortable.
Thermal top x1 – Breathable, wicking and warm material, such as merino. Use as base layer on summit night and also as PJ top.
Thermal bottoms x1 – As above: breathable, wicking and warm material, such as merino. Use as base layer on summit night and also as PJ bottoms.
I used: SubZero Factor 1 Baselayer Leggings – a really under-recognised brand! I love SubZero items and these thermals are no exception.
Climbing Kilimanjaro: Footwear
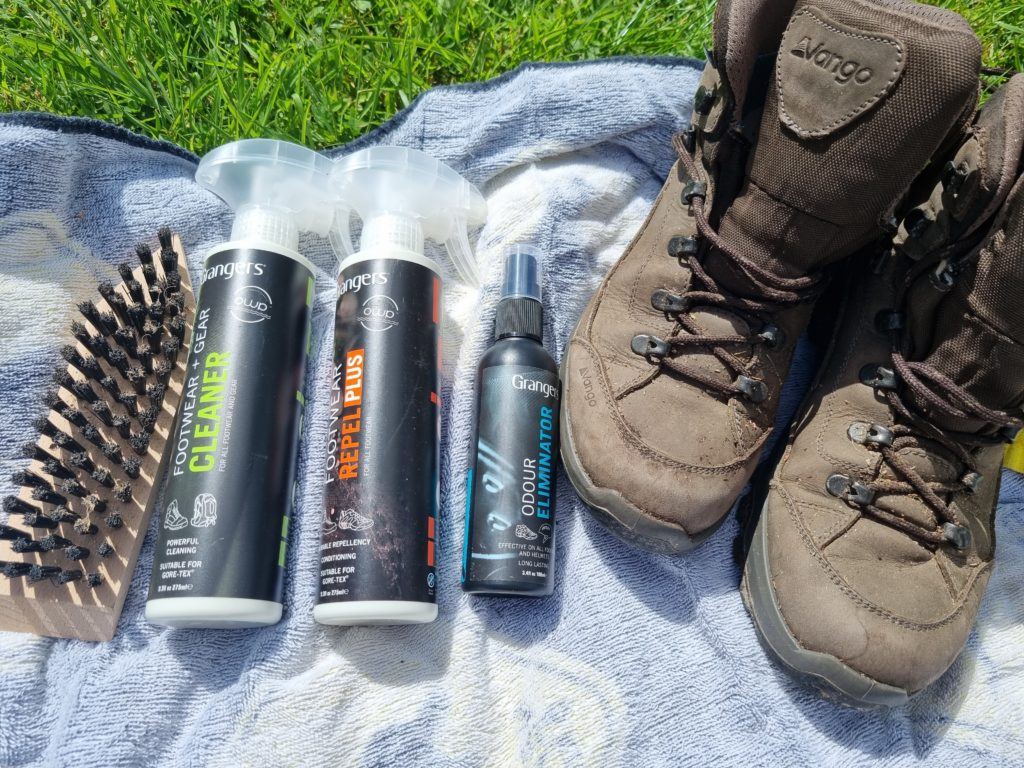
Walking Boots – Well-worn in your training so you know they are comfortable. No need for winter boots unless visiting in specific winter conditions. Clean and waterproof them before you go.
I used: Vango boots + Granger footwear cleaning kit
Liner socks x 4 – Personal preference on the number of pairs. I took 3x and wished I had taken one extra. Used on rotation. Keep a clean pair for summit day, as being dirty can affect performance.
I used: Inijii toe socks (so darn comfy) + Bridgedale
Trekking socks x 5 – 4x standard hiking socks and 1x thicker pair for summit night. I took one less pair of hiking socks and wish I’d had more.
Spare laces – Never used, but something I never leave for an expedition without. You never know when laces might give in and they’re a deal breaker.
Camp shoes – Don’t think you can live without these. Some people don’t take them and almost always live to regret have to trapse around with their boots on in the evenings. Make sure they are easy to slip on and off for midnight toilet runs.
I used: Crocs – I surprised myself at purchasing them. Always said I wouldn’t. But zero regrets. Comfy and let your toes breathe. Heaven for feet.
Climbing Kilimanjaro: Hydration
Water bladder 2l
Another personal preference. I love a water bladder. It’s so easy to sip away on the trail – and it’s crucial at altitude to sip away all day (we were yelling “sippysippy” at each other all day every day on Kilimanjaro).
I used: Camelbak hydration bladder
Bladder tubing insulation
I can’t decide if this was worth it. On summit night, the tubing of your hydration bladder will freeze. The insulation did help stop the freezing for a bit longer. But eventually, it gave in. Plus, insulation doesn’t cover the mouthpiece and once that freezes you can’t drink the water anyway. *shrug*
Nalgene bottle 1l
Nalgene bottles are awesome. Easy to fill up due to the large opening. They also are not insulative – which means you can use them as hot water bottles at night, filling them with boiling water. Oooh, sweet cosy comfort. Some people take 2 and use the second as a pee bottle to stop having to get up in the night! Not something I’ve tried, but apparently takes some practice and depends on if you have a penis or you have skills with a sheewee…
I used: Nalgene bottle
Climbing Kilimanjaro: Snacks
Jelly sweets – Divided a pack or two between the days running up to summit night. And kept a full bag for summit night – you won’t get much in the way of food that night, so you’ll need something that’s easy to grab in the cold and dark.
Trail mix – Classic trail snack. This came in handy on the very first night when I felt unwell. It’s the only thing I could stomach and helped me pack in some calories while curled up in my tent.
Cereal bars – Highly recommend Cadbury’s Brunch Bars. Or maybe make your own!
Hard-boiled sweets – Easy to eat, high sugar. Delicious.
Baby food – Don’t judge just yet! I took a few baby food fruit smoothies on the trip. Specifically the Ella pouches. I’m a big lover of fruit and these were wonderful snacks in my tent. Felt like I was getting a fruit hit (remember there’s not much fresh fruit on the trail) and they were hydrating me when I felt unwell.

Climbing Kilimanjaro: Hygiene & First Aid
Hand sanitiser – Take more than you think you will need!
Travel towel + Face cloth – I rarely used these so think they are very much an optional item. They were handy when splashing my face with hot water in the morning. That was about it. Face cloth was only used once.
Toothbrush + toothpaste – Take a protector for the top of your toothbrush. You’d be surprised where the dust gets to. I wish I’d taken one.
Deodorant – Everyone stinks anyway, but it makes you feel better!
Moisturiser – Luxury item. I get dry skin so wanted to make sure I as hydrating it at the end of each day.
Cleansing wipes or baby wipes – A wipe-shower in your sleeping bag at the end of a sweaty day is FAB.
Bug spray – Make sure you have plenty for in Moshi. On the trail, you’ll only really need it for the final descent day, as the mosquitos don’t survive at a higher altitude. So the travel size is perfect.
Toilet paper – One roll is plenty. You could use a pee rag for no1s too – a product I want to try soon!
Nappy sacks – used for toilet paper, rubbish, and additional packing protection. I put my crocs in a couple of nappy sacks to stop my kit bag from getting dusty!
Blister plasters – Compeed is the best.
Normal plasters
Zinc tape – I didn’t use this in the end. I’ve used it in the past for blister prevention though.
Antihistamines – Fight against bug bites, pollen and dust allergies
Rehydration sachets – Something I did not take. Purely because everywhere I went to buy them before the trip was sold out! A lot of people took these regularly when feeling unwell. I personally bring them in case of a bout of stomach issues, which naturally can happen when eating in a less hygienic environment i.e. the side of a mountain.
Period products – Even if you’re not on your period, throw a few products in your kit. Altitude can affect your period – I’ve had this happen before and sometimes period products are harder to come by in other countries.
Insect bite cream – Didn’t use, but as I sometimes react badly to bites, I’m glad I had it with me.
Painkillers – Ibuprofen and paracetamol. Not aspirin – aspirin is not recommended when at altitude.
Altitude medication – Everyone has their own opinion on medication. I believe in taking it with you on a trip as an option if you do get very ill. However, I don’t ever take it preventatively. You can read a little more about altitude and the human body here.
Malaria tablets – Malaria is not risk on mountain, but Tanzania is a high risk country for malaria. So if you’re spending some time in Moshi, you may wish to take malaria tablets. I did – I wanted to be able to swim in the pool at the hotel without worrying about mosi-bites!
Vaccinations – Don’t forget about your vaccinations! This will depend on your own health and the country you re travelling from. Check the Fit for Travel website for details if you’re coming from the UK. For my June 2022 trip, I made sure the following were up to date: Hepatitis A, Rabies, Typhoid, Tetnus-Diptheria-Polio booster.
Suncream factor 50
SPF lip balm – I have had issues with dry lips ever since I had severe burns while climbing Everest Base Camp. Take SPF lip care seriously!
Personal medication
Antiseptic
Cold sore cream – If you’re a cold sore sufferer, remember the sun can induce an outbreak!
Nail clippers – Toenail care = comfy walking. And fingernails can easily break while packing and unpacking tents too!
Moisturising lip balm – As I have particularly dry lips, I took an additional lip balm to moisturise at night.

Climbing Kilimanjaro: Other gear
Walking poles – People are love-or-hate with walking poles. They can save you up to 25% energy when climbing and are big-time knee supports for steep descents. Note that the descent from the summit is a steep scree slope. It’s worth considering bringing poles (or even just one) to help with balance on that descent. Choose poles with clips rather than twist locks, as they tend to be more reliable.
Head torch – Plus spare batteries or charger. Necessary on summit night, midnight toilet runs and mulling around camp after dinner.
Camera + charger – I took my Gopro and attached it to my backpack.
Phone + charger
Power bank – Can’t charge all those things I listed without a powerbank! Bonus if it’s solar chargeable.
Handwarmers + feet warmers – I brought these for extra warmth at night, which was great. But the best use was putting feet warmers inside my mittss on summit night. Absolute gamechanger.
Earplugs – You may be tent sharing with a snorer (or be near a snorer at camp).
Headphones – Optional. I didn’t use mine at all except for the flights there and back. Some people like to listen to music on summit night for an extra boost.
Climbing Kilimanjaro: Documentation + money
Passport + copy
Visa + paper copy
Covid certification + paper copy
Copy of insurance certificate
Tips for guides and porters – We tipped a minimum of $150 USD each and was told this is average. That amount may be different depending on your expedition setup. The porters and guides deserve brilliant tips, they are phenomenal.
Spending money – You’ll likely stop off at some fantastic souvenir places after you finish the trip. Cards are accepted most places.
Kilimanjaro Kit List: Non-hiking

Bag for hotel + Padlock – Depends on your expedition setup, but we left a bag each at the hotel with clothes for after the trek.
Sunglasses – Casual sunglasses for chilling by the pool.
Fresh underwear – Don’t come back from your trek and have to put on those stinky pants again.
Fresh PJs – I forgot to bring PJs for back in the hotel and regretted it at the end of the trip! Sleeping in pants isn’t the end of the world, but it might be nice to have a clean pair of shorts and top to sleep in.
Towel – For poolside fun, if you have a pool at the hotel.
Swimsuit – Again, pool time.
Travel pillow – It’s a fairly long flight of 7.5 hours. Our flight was an overnighter so I was all about the comfort.
Eye mask
Puzzlebook
Notebook + pen – For plane and for on expedition, to write notes after each day.
Travel clothes – Joggers, t-shirt, long cardigan (doubles as blanket for the plane), comfy trainers + comfy socks
Bobbles + hairbrush – Almost all the girls on our trip popped their hair into french plaits for the expedition!
Shampoo + conditioner
Book – I took this on the expedition and only read it once, when chilling before the summit attempt. Good for the flight though.
Dinner clothes – For the celebratory dinner! Moshi is a fairly religious area, mainly Muslim. But they are quite relaxed in terms of covering up. I wore a midi-skirt, black t-shirt and trainers.
Razor
Bumbag – Handy for shopping in Moshi before the airport
Body spray
Mask – Masks were required on the plane
Face spray – Travel go-to for me. Hydrating face spray to keep feeling fresh on flights!
Climbing Kilimanjaro: Other things I took but didn’t need
Penknife
Chocolate bar – It melted and got super crushed in my kitbag!
Reading light
And that’s it! The full breakdown of everything I took for travelling to Tanzania and climbing Kilimanjaro.
Did this post help you? I hope so! Reach out if you have any other questions – I’m on Instagram or you can email me.

You May Also Like
6 best podcasts for adventure training
10 Eco-Adventure and Travel Tips (2023)